Saturday, March 31, 2012

Hollowed Eggs

This is a fun craft to do with all ages. The nice thing is that you probably have everything you need already at home. Here is what you will need.


1 egg (any size)
push pin
elmers glue
water
paint brush
tissue paper/ glitter/ magazine clippings/ paint etc

*Create a glue mixture by adding a little water and a little elmers glue into a small cup. Mix. *This mixture is good to use for many types of collage.

Take the egg and hold it in the palm of your hand. Using the push pin poke a hole in the top of the egg.

Do the same thing for the bottom of the egg but poke 4 holes in a circle, creating a larger hole. Cover both holes with your fingers and shake. The goal is to break the yolk.

After placing a bowl underneath, blow into the top of the egg. (this part usually gets a big reaction from my teenage students)The yolk and white of the egg will squirt out of the bottom. Yuck!

Run the egg under water, allowing some of the water to run inside of the egg. Let it sit in the carton or a small cup for a few hours or overnight to drain out any access water. Place a piece of paper towel under the egg to absorb the water. (if you are in a hurry use a hair dryer to get rid of the water)

DECORATE! You can now decorate your egg however you choose. With kids I prefer collage using tissue paper. They look really bright and pretty and reinforce the egg so it doesnt break as easily.

Rip up small pieces of tissue paper. Apply a thin layer of the glue mixture to the egg. Apply the tissue paper. Using a paint brush, brush down all parts of the tissue paper so that it is flat. Its good to have a little glue ontop of the paper so dont worry about cleaning your brush in between. Layer the paper however you choose.

You can also coat the egg in tacky glue and roll it in glitter

We also put the egg in a plastic bag and squirted in some puffy paint and glitter glue. Wiggle it around until its covered and it looks pretty cool!

Here are some of the supplies I layed out for my 6 yr old Art student Elise


Another idea would be to make photocopies of photographs and use those for collage. If you really want to make them last you can modge podge them after they are dry.Once your eggs dry they can be displayed year after year.

Hoppy Crafting! (sorry I couldnt resist)

Monday, March 26, 2012

Rainbow Bath

Ive seen this done in a couple different ways and finally gave it a try. The girls had a blast watching and helping make the bath time rainbow. Want to make one for your little ones? Heres how...


Purchase liquid watercolors from your local art store. I had some in my classroom already but purchased some at Hobby Lobby as well. They were in the clearance section for less than a dollar!


Using cheap bubble bath, fill up the tub with bubbles. I used over half of this bottle on one bath!


Pour some of the liquid watercolor into a spray bottle and spray on your design.


We made a rainbow but you can do anything. Color the water blue and lay out toy pirates, mermaids and a ship. Make the water pink and lay out a princess crown and jewelry for a princess bath. With the rainbow you can fill the bottom with beaded necklaces and gold coins for them to search for!


My girls had a blast with this


The liquid watercolors will stain your clothes and skin if not diluted. Once you spray it into the water its diluted enough not to stain their skin or the tub. At least it didnt for us. Have fun!

Thursday, March 22, 2012

A visit from the Leprechaun


My Family is Irish and we alwasy take st Patricks Day to a level most people dont, lol. No matter where we have to go that day we are decked out in green, meeting up at the local pubs to here some authentic Irish music. The one thing I loved as a kid was waking up St Patricks Day Morning and running down the stairs to see if the leprechaun came. This year we were a little worried because we would be staying at a hotel in Pittsburgh in order to see the parade in the morning. He did not dissapoint the girls, leaving a bunch of green treats all over our hotel room. He even peed in the toilet! (green food coloring and green glitter) here are a few photos I took that morning.


Monday, March 12, 2012

Let them get MESSY!

Pin It

Sometimes we may find ourselves tring to steer our kids toward the clean activities. A board game, dolls, video game etc are much easier to clean up than art supplies, sand, water and play dough. well I am here to encourage you to LET THEM GET MESSY!

Whenever I call up a friend for an unexpected visit the response I usually get is "you can stop by but the house is a mess" my response to that is "Good, it means you are letting your kids play in it!" (plus ill feel more at home, lol)

Being an art teacher my house is the place all the kids come to to create art! My medium of choice for little ones is paint. I always have the paper and brushes ready with lots of tempera and watercolor paint. Here are some pictures of my kids and their friends getting messy!

Riley, 3 yrs old. Painting with Daddy

Riley and Sophia both 2 yrs. Yes their painting in the living room. Shortly after this we layed down a plastic mat


Alex 16 months old

Riley 3 yrs old. This is what happens when you leave your 3 years old alone with paint for five minutes while you change the babies diaper. She had it everywhere! Nothing a wet rag couldnt clean up :.)

Lady Bug 1st Birthday Party

For my daughter, Alex's 1st birthday I decided to decorate it with a lady bug theme. using mainly paper products and a few purchases I created a cute theme on a small budget.


Pin It


1.Using black and red poster board I traced a large cirlce using a round stool for the base of the body I then used a tupperware lid to draw another small circle for the head. I then cut out the black shape, leaving them attached.

2. Free hand the wings, making one stencil and trace it over and over. to create multiple wings


3.I used the cricut maching to cut out the black dots. If you dont have a cricut you can purchase a hole punch in the scrapbooking section of any art/craft supply store.


More of the paper dots were just taped down to a red paper table cloth. place mats were purchased from a party supply store.


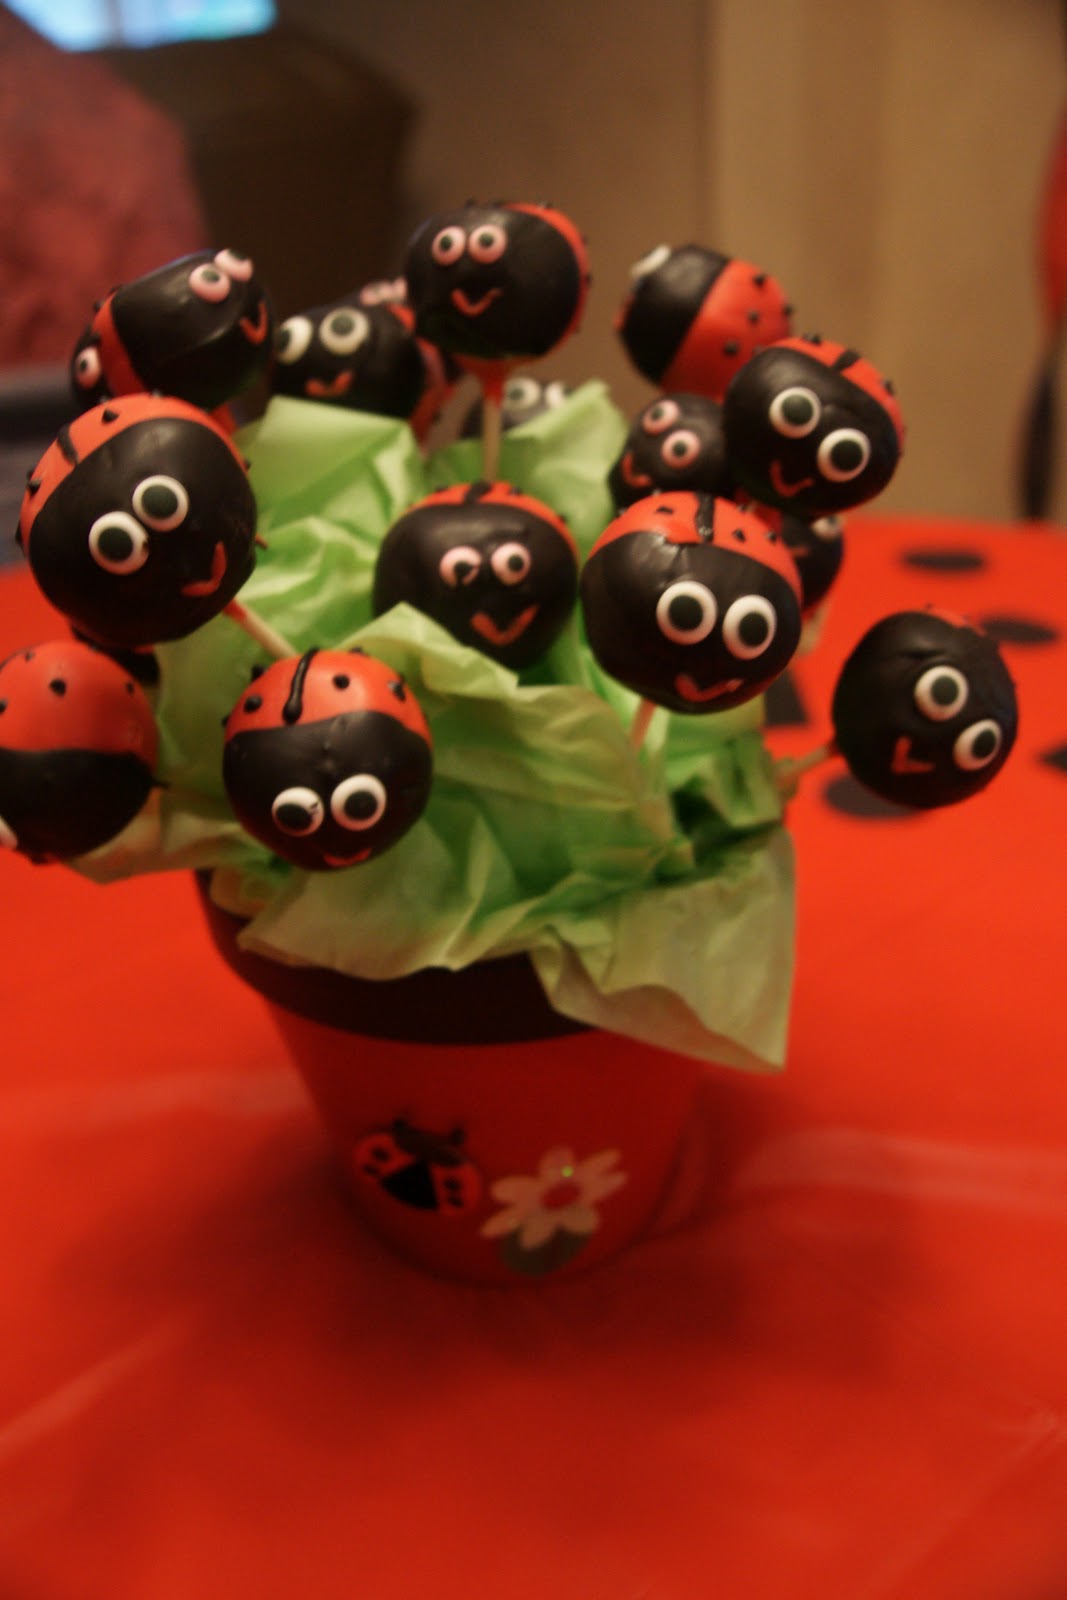
Lady bug cake pops were made by a local baker and made an adorable centerpiece. I had just enough for the kids. Check out Sherry's site here


I purchased this banner on etsy from sweetheart party shop for $35.00. It was made using the Cricut machine. (I know, I know I have a cricut but didnt ahve the time or energy to make it myself!) She did a beautiful job!


I purchased the polka dot balloons from a local party store. If you cant find them just use a cirlce stencil to color them on with a black sharpie. I also did this on red plastic solo cups.


My friend made the  Smash Cake using a circle dish for the body, a hostess cupcake for the head and mini oreos fo the spots.


I purched a sheet cake with green on the bottom to act as grass. I also had them do the writing. My friend created another ladybug like the smash cake to put ontop. Using another hostess cup cake as the body, we created a mini bug by adding a head with a mini oreo.


Bolloons purchased at local party store


After cake all the kids ran outside to search for lady bugs! you heard me right, REAL LIVE LADY BUGS! they were super cheap and I ordered them on line. (Thanks mom for lettinh me release 1,000 into your back yard!) Purchase ladybugs here. I released them an hour before the party started to give them time to spread out.


though the baby wasnt into going outside in the rain, my 3 year old riley was all about it. she caught 6 lady bugs and kept them in the caintaners I made. I founf clear containers with red lids at marcs. They were $.99 for three. I then added more polka dots and poked holes into the tops.


finish off your party by dressing your family in red and black. It makes for an adorable scrapbook page later!


Sunday, March 11, 2012

Let me introduce myself

I thought my first post should be to introduce myself. Im just your average Ohio girl. Raised in the same town that I now live in. I have a Bachelors Degree from Kent State University in Art Education. I currently study at Youngstown State University where I plan to graduate with my Masters in Art Education this Fall. I teach Visual Art at our local High School and offer classes such as drawing, painting, ceramics, crafts and general art for junior high.
My sister owns a dance studio and I have The Art Studio in the same building. I teach all types of arts and crafts there to all ages, as well as private lessons. I love to create fine art, often teaching myself new techniques through you tube videos or books. I am a scrapbooker, crafter and self taught photographer. Im not perfect, in fact my life is crazy. Im unorganized, always late and often forgetful. I have learned that my family is the most important thing in my life and as long as they are with me everything is ok.
The other day,I encouraged my sister who loves to create crafts for her sorority sisters to create her own blog. She took my advice and started right away. Check out her blog here  I decided to take my own advice and start one of my own. I plan to share a positive outlook on life, taking an every day event and making it special. I love to take something simple, and make it into a memory, especially for my daughters. So follow me on this journey (I have no idea where it will lead me). Life is beautiful. Lets create it!

Follow Me on Pinterest